The Worth of a Challenge


If you give a child a fish, you feed him for a day.
If you teach a child to fish, you feed him for a lifetime.
But if you teach a child to learn, you feed him for a lifetime
and he doesn't have to just eat fish.

Showing posts with label workboxes. Show all posts

Thursday, August 25, 2011

2011-2012 School Room

I did a little rearranging and also I have made a huge change in the way my kids will do work.

One thing that is different is my new area devoted to the calendar and our math meeting. There is nothing "special" about it so much as, it is there and not on a science back board or in pieces all over the room.

 This is our bulletin board, born out of necessity it is on our folding doors that go to the closet. It really gave me the space I needed without having to move furniture. The theme is oriented around the stories and books we will be reading. We will be displaying work on it as it its completed.
 This corner of the room used to be filled with clutter but I have managed to streamline as much as I could and then also I turned the desk so I would have more floor space and give the kids a better academic view.
 This corner is a little different but really it was done for storage sake.
 Here is our trusty white/magnetic board ready for writing practice, word making and math fact practice.
 the listening center, same as always!
trusty art easel on the other side of the doorway
the sensory bin in it's new home under the window
And our new writing center, where writing, drawing and coloring supplies are available.
So did you notice what isn't there.......workboxes. I decided to do away with workboxes. They were a lot of work that overwhelmed the kids and me and they also occupied space I didn't have in the first place.
I have decided to switch to a folder/binder system instead. It allowed me to save on space and taper how much "stuff" went into our learning. I put a weeks worth of learning into my binder and then stuff four folders for each kid each night before school. Jacob has yellow folders and and Benji has orangie-red ones. When they are done with their folders they place them in their bins with their names so I can check their work.

Saturday, April 9, 2011

We can eat a rainbow!

I am doing a health and money unit and I am getting the kids ready to be money smart and health smart. I set a really simple activity for the boys.

I pulled out the color cards from Kizclub and the bin of play food and gave the instructions to match it up and then a short explanation of why we should eat foods of different colors and why we need variety in our diet. This one was a huge success with Benji who loves our play food.

Thursday, March 31, 2011

Centers!

We started off the day today with centers. Its always fun to mix things up and not start the day as a worksheet factory.

1. Reading fun with racing cars:  I went to the activity section of Making Learning Fun and loved the large assortment of stuff available. I would even call it a printables "wonderland". I found this race car activity that was very exciting and engaging to do. I tossed all the cards in a basket and then put out markers and the booklet that comes with it. It took no instruction for my child to figure out what to do. He read the cards and matched the correct car. Afterwords, he then colored the booklet with no problem. This is a great center for independent learning.


2. Counting Fish: I came up with this when Benji started to try to count past ten on his own. I found this is great for fine motor skills and counting and more. I just drew a simple fish bowl with marker on some cardstock and then gave him a sheet of small fish stickers and let him count as he placed them in the bowl.

3. Fish Addition (adding two): This is a super simple center. I just used laminated fish. I wrote the math sentence on one fish and the answer on the other fish and set them in piles. I gave unifix cubes as counters to help make the sentence. Just let the child do the addition and match the fish.

4. Chicka Chicka Sight Words: This activity also came from Making Learning Fun.
  I tossed the word cards into the basket along with some letter tiles.

I then had my child match up the tiles with the word on the cards provided.

Don't have letter tiles? No problem, just let your child use a dry erase marker on laminated cards. Or you can make these letters and just cut them into square tiles rather than circles.

Want to focus on vowels? You can have your child do a vowel sort before making their words
I found this card at Confessions of a Homeschooler.
Looking for more? just check out the links from todays posts, they are loaded with tons of fun and easy educational ideas.

Wednesday, March 30, 2011

Animal Classification: Enrichment and Extensions

We have been working very steadily on our animal classification and adding to our bulletin board(which is really the bi-fold doors to the closet)
Up to now we have learned

  • the difference between living and non living things
  • kingdoms of living things
  • vertibrates and invertabrates and how to tell the difference. 
  • we have also subdivided the animal kingdom into mammals, reptiles, amphibians, birds and fish
At this point we are having fun adding extensions to our learning with lots of fun activities.

We played with puzzles to learn all about the different animals


We played folder games. The top folder games I made from Primary Partners and the bottom one came from File Folder Fun.


These were the selections pulled for silent/independent reading.

We sang Kindermusic songs about the creatures in our backyard

We played with animals and their habitats

We sorted mini animals into their different groups

We did our math using a barrel of monkeys(besides who says you have to count beans!)

We played fish games. (These came from Nana!)

We read the book Froggy gets Dressed. (The boys love these books, they are simple and sweet and fun)
We used the materials from Kizclub to add to our reading experience.

These activities were so fun and my kids really enjoyed them. It was also a nice way to step away from worksheets for the day.

Thursday, March 17, 2011

Place Value: made simple!


          We just learned place value to the hundreds and soon will work up to the thousands. But for now, we will be sticking to numbers less than 1,000.

          I knew this was coming and looked into a lot of different ways to teach this math concept. I checked out math u can see. It's a wonderful system, but you have to pay for those pricey math block sets and then you also have the issue of color memorization rather than number. ie. pink + red = ??? rather than the numbers they represent. I looked at the math manipulatives that they sell at the learning store and still, not only do you have to buy a class set, but you also have to pay a small fortune for it. Well, I found a way! I did find at Lakeshore a small student set that is meant as an add on to the class one. It was just a few dollars and had all the pieces we needed.

I purchased the set and went to work putting the concept together. First, you have to have a well established grasp of what 1,10, and 100 are. Once you know your child has that figured out(although most first graders should at this point) you can take your set and brake it down into piles of  1's, 10's and 100's. If you don't have a set, you can print off this 100's grid on colored cardstock and then cut it apart to create the pieces you need.

  1. Show how ten 1's become a 10. If you have more then ten you leave the "extras" in the 1's place. We had lots of fun trying to stack all the ones onto a ten bar. 
  2. Show how ten 10's become 100. Again if you have extras explain that you leave them in the 10's place. We then stacked them onto a 100.
  3. all of the new 100's go in the 100's place. 
  4. count each group and write the number above it.
  5. Say the name of the number reading from left to right. 


I found this was a very easy way to show the meaning behind these big numbers.

We found a great game to review the concept from File Folder Fun. I called out the numbers and my child put the chickens in the right shell.

St Patricks Day Fun

Shamrock
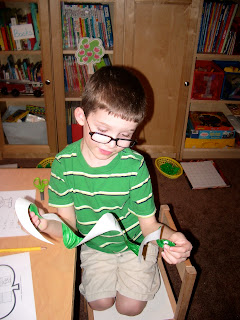
Lot's of fun to be had this March 17th. We made sure that we wore green shirts so we don't get pinched and then let the fun begin.

We did do-a-dot shamrocks from DLTK. Don't want to do a shamrock? They have lots of other designs to choose from including a pot of gold, a rainbow and more.

We played a game* where we rolled the dice and moved a green teddy bear from 1-20

We pulled out all of our green manipulatives and found different ways to express what was in the baskets using a piece of graphing paper.

We graphed: green vehicles

unifix cubes

teddy bear counters

linking cubes

Benji wanted to mix things up by adding orange ones....can you tell that is his favorite color!

We made necklaces with green beads

Again, Benji was not satisfied with just green.

We colored a snake and gave him beady eyes (I found the template here)


We made a St. Patrick's Day word wall*

We made a picture* to match our song we found at The Mailbox.

We played Pot 'o' Gold from File Folder Fun
 This is a great free file folder game that teaches nouns and verbs

We also did Shamrock Phonics to review some basic word families. You can find this one at File Folder Fun as well. They also have a color matching game and a place value game that fit this theme.


*These printables are all part of a wonderful download from Musings of Me. She had a lot of other activities in the packet, but alas, we did not have time to do them all. At least there is next year!